Search This Blog

Translate

Sunday, December 18, 2011

Back Door Entry.Ladder Tree.Birds.Bells

Why did I spend a lot of hours decorating the front porch when everyone uses the back entrance through the garage?  I knew all the family would be coming in this way and the garage, work tables and counters were really a mess.  You know how it is when you start digging stuff out to decorate with. Not only this, but the mess that I always leave. Wish I had taken the before pictures (well maybe glad I didn't. It would have put you in shock).

This is the door that opens into the laundry room or mud room where everyone takes off shoes and hangs coats.
I had painted these walls and door several years ago and the color was perfect for the red ribbon to hang and make it look like a tied Christmas present.


I had bought this wood extension ladder at Estate sale and with so many Bloggers doing ladder Christmas trees, this gave me the idea for this. This ladder has five sections and using just these two sections, it is seven feet tall. Most of the stuff on the tree came off this red peg rack or sitting on the counter. I strung 100 tiny clear lights running diagonal from bottom to top. I covered them with branches taken from a scrappy sparse tree. The branches are wonderful but did not make a nice tree. It has natural pine cones and I added a few other dried seed pods.

A pressed copper Cardinal has landed in the very top.
Birds have built nests in old dippers and strainers.


From a nearby shelf I found a little strawberry box full of small bells and I tied all of them to the ladder rungs with raffia. You will see them hanging down behind the limbs. The iron handle is to the dipper that the little bird (highlighted) in the next picture is hidden in.


Two colorful birds are perched on the iron skimmer.

The old white tin pocket holds berries for the birds.
You can see some bells hanging on the rungs in this picture.  
This big green worm has eaten his way into this ceramic apple birdhouse. Hope the Mama bird does not eat him.
I think this tiny bird is ready to flee the nest.


An old white cow bell with a very loud gong still has the neck collar strap. A smaller bell hangs below.

The white scrolly metal basket it full of fax moss balls, nests and a vintage birdhouse. This is sitting on the counter left of the tree. You can also see my small collection of keys hanging on the wall and peg rack. The two large birds were covered up housed in this huge wire basket of ivy (below)that is in the garage for the winter.  
They are happy to be free.


This handmade wire fence basket is wonderful and I hope to duplicate it soon and do a tutorial.

This little red child's chair was stacked with the same stuff you see here; plus a little more, but was not arranged just stacked ...
looks better.

Hopefully, the lights will be a warm welcome to our family and friends.

Hope you enjoy one organized corner of my garage.

Christmas Blessings.

Linking to: Knick of Time Tuesday  #13  Photobucket"

Linking to: Debbiedoo's Blogging and Blabbing Newbie Party Debbiedoo's blogging and blabbing


Saturday, December 17, 2011

Rusty Wheel Wreath and Window Drape


Last Sunday when we come home from Church and drove in the garage, this old rusty wheel on my peg board caught my eye ... there is a ready-made wreath. 
(You can click picture to enlarge)
I put the wheel inside a spiral grapevine wreath that I bought the other day for $3.00. They fit together just perfectly ... well almost.

I had just finished hanging the window garland drape on my dining room window and added the old rusty metal bow. The wreath and the bow complement each other very well.

 A few grungy tin stars and a glittered Christmas tag was all it needed. A old green sap bucket is holding the tall twigs.

When my hubs saw it ... he said ... "what's that ???"
He just does not understand "rusty" treasures.
The spiral wreath gives the illusion that the wheel is turning.
The old red barnwood rack with glass door knobs that a friend gave me was the perfect place to hang it.
(good friend to have as he demolished old buildings and saves everything)...The hand painted tray hanging above just echo the rustic feel of an old farmhouse and barn.

Not my usual kind of wreath, but it was fun to make and worked out okay with this display.

Hope you get inspired to use what you find to make some fun and different Christmas decoration.  


The window Garland drape is faux iced pine with tiny pinecones. I added the snowflakes and peppermint twist ornaments. The large ornaments on the sides anchor the setting. 
Snowflakes are from the Dollar Store this year. The pepperment twists were bought there at least ten years ago.  I never tire of them. 


Wishing everyone a Merry Christmas.


Thursday, December 15, 2011

Christmas Mantel.Happy Snowmen.Santa's Socks.Green Gate.Artichoke Garland

This year, I wanted to do something a little different on my mantel and I tried two ideas before this one. I have tried a mirror on the mantel, but it only reflects our ugly ceiling fan so I opted to use this green iron gate to pull the eye upward as this is a very tall fireplace. I love my snowmen, and old stuff that that I have collected and repurposed.
(please click picture to enlarge)
Hope you can relax and enjoy the pictures. 
The mantel has tiny white light covered with a pip berry garland and fresh greens. I strung lights around the top of the gate to show the shape. The vintage tree-top star in the spiral natural wreath also helps to add light. The garland begins with a cluster of large rusty bells and small brown bells strung on a wire.

I added the five dry artichoke ornaments that I made last year that are embellished with feathers, greens, red beads and prisms to catch the light.
Happy Vintage Snowmen make me smile. The one on the right is styrofoam and standing on the other side of the birdhouse church is paper mache and pretty time-worn
but he is really special.
He is an advertisement for Kentucky Tavern and originally held a cardboard broom with an advertisement on it.
This little guy is very happy that he found the perfect Christmas tree that he dug up with his shovel and hauled home in his little red wagon.
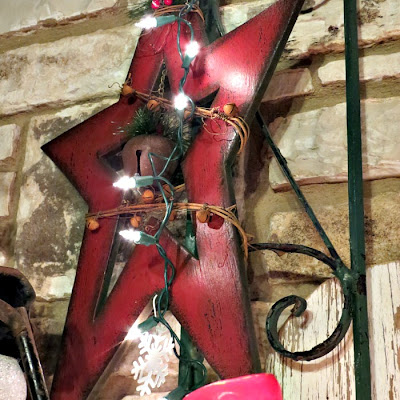
 This wooden star wrapped with rusty bells, adds more of the happy red color. 

And oh, how I love the old paper mache Santa's socks. I hate to admit that I passed up the mittens and cap ...
Duh, only $2.5o each piece. How could I do that?

More natural elements.

Lantern was a recent 'junkin' find. See the before below. It is a small porch light. I removed the wall plate, rewired it, wire brushed it with a small brass brush, oil waxed and made it free standing. It has amber glass, but reflecting the red which I love.

Lantern before. (not pretty)
 
Oh sorry ... I forgot to mention the shabby 25 numbers.
See the shabby numbers behind the gate?
I cut these from a weathered piece of sign board. I had the pattern for the 5 ... turned it over and used it to draw the 2 ... some freehand drawn, but they match pretty well.

This is an important day that we all need to remember the 'reason for the season'  is to celebrate the birth of
Christ our Savior.   
(below is a better view of the numbers)


Christmas Blessings to everyone.

Hope you enjoyed viewing my Christmas mantel.


Linking to:
Funky Junk Interiors Christmas Mantels 

Linking to:  2805 Potpourri Friday

Linking to: At The Picket Fence Inspiration Friday

Linking to: French Country Cottage Feathered Nest Friday


I was featured at  

Tuesday, December 13, 2011

Dryer vent hose Snowy Snowman Tutorial

This little guy came real early and showed up in my Fall mantel decoration. I guess he wanted to hurry Christmas.
He didn't stay there long as he was sent to the workshop to be cloned/copied.


I had visions of decorating my Christmas mantel with white and silver this year. When I saw this little guy at the Thrift for $2.00, I knew he was perfect for my plans. Then I thought he would be so easy to make and share him with others. He is likely an old craft that I have not seen before. 
I went to the Hardware store and bought two sizes of white plastic dryer vent hose. (it only comes in two sizes and is sold by the foot)... very inexpensive/cheap. Three feet of the (2") small at 49¢ a foot and seven feet of the (3") large $1.29 a foot. (wanted some extra here to make a pumpkin)

Scissors and a glue gun were all the tools that I needed.   


I pulled it out and coiled together to determine how much I would need for the bottom piece. I think I used three feet for the bottom and two feet for the middle.
Black lines are the foot marks ... After you determine how much you need ... cut the wire and then cut the plastic back to where you cut the wire. Be careful not to cut past this place. Pull it together and hot glue the two ends together.

Do the middle piece the same way. I had to stretch mine so maybe allow a little more than two feet for this one.
So far ... so good ...
 
Now for the head ...
Use the smaller vent. I had troubles getting it shaped and glued because it had to be pulled so tight. Tied it in the middle and that helped a little. Gave up and walked away and said "little guy, you will make three pretty pumpkins for next year and I would rather be sawing out my numbers for my display than building a snowman"
So I preceded to do just that.  

I felt really guilty not finishing the snowman, so finally went back to him and stitched his head together. I sprayed him KILZ to cover the black lines and then white paint ... later with flocking snow. The snow just brushed off.
  
Fast forward to three weeks later ...
I was working with adding snow and glitter to some pumpkins that I had painted and why not do something with Mr. Snowman?? I mixed Epsom Salt and Rainbow snow flakes together ... just a small amount at a time. Did the bottom layer first. Taking one small area at a time ... I sponged on my home made Mod Podge of 4 oz Elmer's glue and 4 0z water and sprinkled the snow mix on him. Put glue on the brim and top of the hat and sprinkle with snow.
And here he is with his rolled felt orange carrot nose; vintage buttons for his eyes and shirt and the beautiful top hat all covered with snow. Oh yes, the animal print scarf. Looks really sharp doesn't he?  Sorry that I threatened to make pumpkins out of him.
(top hat is from the Craft store and cost about $2.00)
Not expensive to make.

 And here he is with his twin.
They will add some fun to my Christmas decorations.

Hope you enjoyed this tutorial ...

Christmas Blessing to everyone.
Linking to:


Debbiedoo's blogging and blabbing  Debbiedoo's Newbie Party 


Related Posts Plugin for WordPress, Blogger...