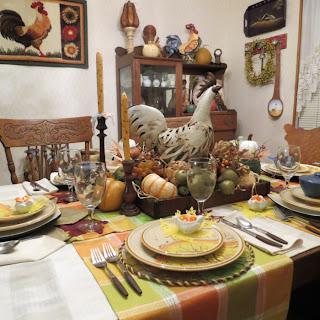
I had seen Chicken Wire Cloches featured in some decorator magazines and loved the look. I decided that I could make them because they were so expensive to buy. I made two and then my friend says she loved chicken wire cloches but wanted
Chicken Wire Chargers.
Chicken Wire Chargers.
 … OKAY ... no biggie,
 so I set out to make a Chicken Wire Charger.
I had everything I needed, so here it is.
I removed a wire ring from a tomato cage … the largest one on this cage was 12” and I thought that would do for a trial run. Next, I cut a piece of chicken wire about two or three inches larger than the ring. I laid it flat on my work bench and stretched it really tight, securing with nails, staples and telephone wire clips to keep it taut … then placed the ring on top and folded the excess wire over the ring toward the center.
When wire was tight all the way around, I removed the nails, staples or clips, releasing it from the worktable.
The wire should be tight and should not move. Then comes the fun and few finger pricks from the cut wire points. Cut away some of the excess wire that you folded over, leaving just enough to wrap a couple laps of a single wire around the ring.
One lap may be enough. Try not to wrap with any of the twisted wire as it will be too bulky. If possible, lay it along side the metal ring if you end up with the twisted section at the ring. Be careful not to cut the wire too short or cut the wire and mess up the shape of the chicken wire design.
 Wrap it around the hoop and cut away any excess wire. You may be able to remove a short piece of the wire that is twisting the wire design together. If you don’t need it … remove it. The less you have to wrap around the ring, the neater it will be. Try to place the ends of the wires where they will not puncture a finger, like to the inside of the ring.
Then you will have this. Neatly attached to the ring and tight as a drum. Not as hard to do as it looks.
I laced the edge with jute twine but you could use leather, narrow burlap ribbon or fabric. Try to place the jute over the places where the wire is tied. Not possible on every wrap, but what you can cover, will help.
Tie a bow when you complete the lacing.
These Charges would really make a nice statement on your Chicken or Rooster table setting.
This is a 10¾” plate … not much charger showing.
This works out nicely with a 10” plate, but I would like it to be 13½” inches for the larger plate. I am looking for an affordable ring this size … maybe a wreath form. I found a perfect one on a tomato cage at Lowe’s, but would cost about $6.00 for one cage and would be too expensive to make eight and taking it off would ruin the cage. Will keep looking.
Hope you enjoyed this tutorial.
You can see my Roosters and Chicken Wire HERE.
If you have a suggestion for a ring, I would appreciate hearing from you.
I welcome your comments and questions.
You can see my Roosters and Chicken Wire HERE.
If you have a suggestion for a ring, I would appreciate hearing from you.
I welcome your comments and questions.
Thanks … Audrey Z. Timeless Treasures
Joining:
Funky Junk Interiors
Debbiedoos Blogging and Blabbing
Knick of Time
Joining:
Funky Junk Interiors
Debbiedoos Blogging and Blabbing
Knick of Time


Amazing job! I can't believe you did that with chicken wire! I barely survived putting it on a chicken coop. I'm you're newest follower and I'd like to pass on the Versatile Blogger Award. Please accept it and pass it on!
ReplyDeletehttp://chickenscratchny.blogspot.com/2011/11/award-winning.html
Thanks Alecia... WOW .. Versatile Blogger Award. I am honored. I will accept it and pass it on. Audrey
ReplyDeleteI was searching the internet for "chicken wire chargers" and was led here to your blog. These are amazing!!! I love them. Did you ever find a good ring??? I hope I can make these. XO, Pinky
ReplyDelete