
NO ... I did not take a hammer to it, but I sure wanted to!
I did "break-it-up" by camouflage ... or hiding part of it.
 I had bought two nice vintage mirrors with plans to remove the 8' mirror and hang these over the sinks in the vanity.
 (check the link below to see the "fix" of these mirrors)
Mr. Z. objected; stating that he liked the large mirror.
We would have had to hire someone the take the mirrors down and dispose of them which would be very costly.
 Size of this vanity area of the master bath is about 5' wide x 14' long plus
the built in wall to wall storage cabinet at the end. One 8' vanity with mirror and one 5' vanity with
mirror.
Size of this vanity area of the master bath is about 5' wide x 14' long plus
the built in wall to wall storage cabinet at the end. One 8' vanity with mirror and one 5' vanity with
mirror. 
That is a lot of reflections in one small room.
Love my new crock jug that I just bought at an Estate sale, $8.50, so I don't mind seeing more of it in the mirror images. Color was a good match with the mirror frames.
So much for all of that ... I know you are wanting to know how I "broke up" the large mirror.
My inspiration was to frame the mirror and build a cabinet in the middle but ... just not able to make that happen just now with all the other expense of this total master bath remodel.
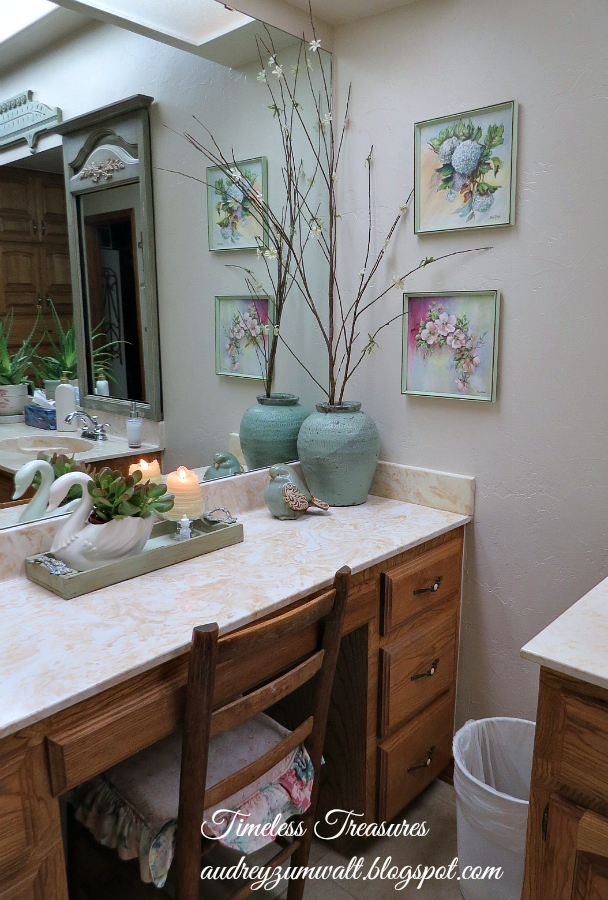
So the next best thing was to "break-up" the expanse of the mirror ...
I removed the mirror from each frame and hung just the frame on each end of the 8' mirror.

Images of the things across the room make this a confusing photo and you can see me trying to hide behind the Aloe plant.
This left 43" of mirror between the frames.
To "tie" them together, I hung a salvaged piece from an old piece of furniture (or something) above the mirror between the two frames. Almost a perfect fit. I had this piece forever and surprised I found all the parts to it. Once restored, painted and antiqued, it matched pretty good.
Florescent lighting makes the color look different and hard to get good pictures.
This gave the mirror the bulk that it needed to balance out with the large cabinet below.
The frames came just over the top of the mirror and I made a spacer to make that part of the wall level with the mirror and hung them on the wall above the mirror.
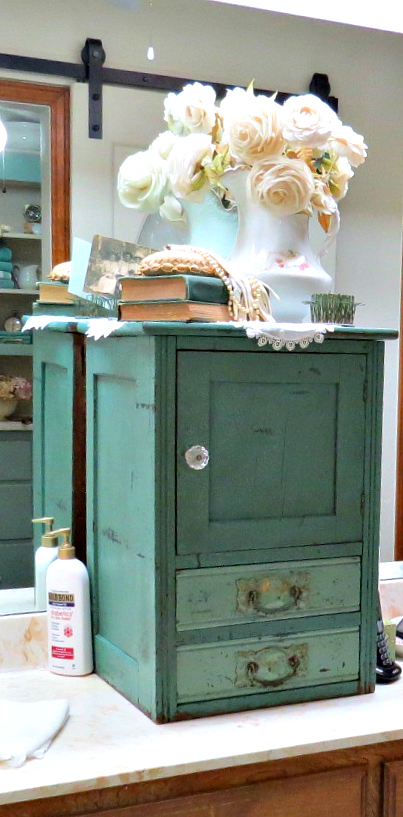
With the first trial run, I sat a small cabinet on the counter between the mirrors.
I really need this to keep some stuff off the counter.
It was the bonnet box part of a vintage vanity/dresser and was just what I needed there, but after a week or so, decided it was too big, so back to the guest bedroom it went. Someday, I will find the perfect piece for this spot; build one or I might try this piece there again.

Then I brought my beautiful Aloe plant
inside and it helps to "break-up" that middle section of the mirror just a little. I
am sure I will have to put it back outside because there is no
natural light in this room.


NOW ...
the other side of the room: the sliding or barn door style ...
The toilet/shower room and closet remodel was completed late last year.
(see related link below) Sliding door closed ..................................................look from inside shower/toilet room


 Antique door knocker on the sliding door in case it is needed. LOL, just needed something to add to the door, so he got used.
Plans for this wall space is still undecided.
Considering doing a tree limb stencil in this section.
Using jade, teal colors in this room, so the color of this piece will change if it stays.
I won't bore you with details of the products I used ... just check the list at the end of this post.
BEFORE:

door (with the tacky mirror) to the shower/toilet room is GONE !
old wooden towel bars are GONE !
mess from the closet remodel is OVER too.
AFTER:


I removed the wallpaper, primed and sealed the walls.
This little tool (bottom right) is a must-have if you plan to remove wallpaper.
I hired a friend to texture and paint.
She hand troweled the texture which is free form and looked like puffy clouds when drying.
Related posts:
KILZ Premium.
Behr Premium Plus "Spanish Sand" interior satin enamel paint and primer in one.
Mirrors from ReStore-Habitat for Humanity $5.00 each
Hairdryer to heat glue while pulling wallpaper.
Vinegar water to dampen wall paper backing paper and wash down wall. Applied with a wide brush, a little at a time.
Zinsser paper scraper ... cost about $7.00.
Mine was thrifted for .25¢.
Sliding door hardware ... Home Depot $150.00
Door ... thrifted and restored ... check out the blog post on that.
Thanks for sticking with me for this long post. Hope you found something of interest here.
Linking to: DIY by Design: Fall into Fall party 238
The Dedicated House Make It pretty Monday week 155

Coastal Charm Show & Share No. 285

Knick of Time Vintage Inspiration Party #210

Funky Junk Interiors Upcycled Link Party Repurposed

Vintage Charm Party #2

Wow! What a transformation! I love the way you hung the frames over the large mirror - it makes a statement now. Wish I had room for a sliding door.
ReplyDeletei think it is gorgeous and breaking up the mirror with the frames was genius xx
ReplyDeleteAudrey, such a great idea to repurpose your mirror & I love the way it looks over your existing mirrors! Thanks so much for sharing it @Vintage Charm! Hugs, Cecilia
ReplyDeleteBravo, Audrey! What a fantastic and beautiful fix for a wall of mirrors! Anybody who has had a very large mirror knows that it's just not as simple as taking it down. Most of them have a fair amount of adhesive gluing them to the sheetrock, which is in need of repair once the mirror is removed.
ReplyDeleteWow you really are a busy lady. - You did a fabulous job with this remodel. I think it looks great. Love the color scheme too.
ReplyDeleteYour bathroom turned out just beautiful!!!! What a lot of work and patience must have gone into it! Nancy
ReplyDeleteHi Audrey,
ReplyDeleteWhat a gorgeous soft blue you've chosen to update your bathroom.
Thanks for your visit to my place.
Audrey, I love how you broke up the mirror! We have those mirrors too in the city house. I've been wanting to do something for years to make them look better. I really like your idea! Love how your bathroom looks now.
ReplyDelete:-)
Cecilia B.
Audrey, I love what you did with your large mirror...I must remember to be on the look out for a pair for our bathroom! Thanks for the idea!
ReplyDeleteJP
Glad I stopped by to visit. Your bathroom is just sensational! Love the sliding door!
ReplyDeleteooo...I love what you;ve done with that large mirror...it looks super good. Hope your honey likes it, too...we gotta keep them happy, ya know. LOL
ReplyDeleteGreat job....
Your bathroom looks great. What a transformation. I just love all of th e wood carvings along the bathroom mirrors and all the attenion to details that you have paid. Now you will be able to enjoy it.
ReplyDeleteAudrey, I love what you did with the mirror. It is so much better now! Your idea is genius!
ReplyDeleteIt all turned out excellent, and I suppose everyone has been telling you how much they love the barn style antique door. Well just add me to that list as well!
ReplyDeleteAudrey this bathroom doesn't even look like the same bathroom! You've added so many pretty things. The mirror idea is total genius and the sliding barn door is super awesome. Hope you have a fun day, CoCo
ReplyDeleteAudrey, you did a wonderful job on your bathroom makeover!! It looks so good!! Love the mirrors above the vanity!!
ReplyDeleteWow, what a project and what a lot of mirrors. I have seen cabinets placed over mirrors to hide some of the multiple images..you get with the funhouse look of so many mirrors. Your frames are really an improvement. Thanks, Sandi
ReplyDeleteThis is amazingly clever!!
ReplyDeleteSuch a great post.thanks for sharing regarding bathroom mirrors. it's helpfull for me.
ReplyDeletemirrors bathroom